diff options
Diffstat (limited to 'keyboards/ergodox_ez/readme.md')
| -rw-r--r-- | keyboards/ergodox_ez/readme.md | 49 |
1 files changed, 26 insertions, 23 deletions
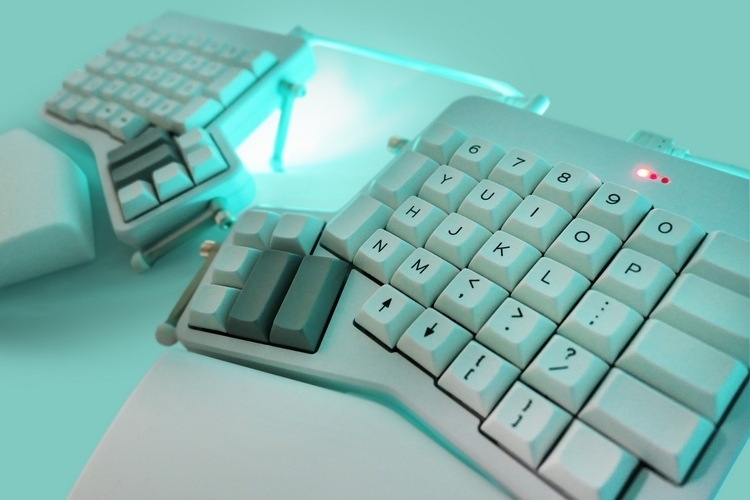
diff --git a/keyboards/ergodox_ez/readme.md b/keyboards/ergodox_ez/readme.md index bce8ff3c6f..796e96ce53 100644 --- a/keyboards/ergodox_ez/readme.md +++ b/keyboards/ergodox_ez/readme.md @@ -1,41 +1,44 @@ # ErgoDox EZ -The Ez uses the [Teensy Loader](https://www.pjrc.com/teensy/loader.html). + -Linux users need to modify udev rules as described on the [Teensy -Linux page]. Some distributions provide a binary, maybe called -`teensy-loader-cli`. +The ErgoDox EZ is a mass produced version of the original ErgoDox keyboard, with optional support for RGB Light (Shine) or RGB Matrix (Glow). -[Teensy Linux page]: https://www.pjrc.com/teensy/loader_linux.html +* Keyboard Maintainer: [ZSA Technology Labs Inc](https://github.com/zsa), Firmware maintained by [drashna](https://github.com/drashna) +* Hardware Supported: Original ErgoDox, ErgoDox EZ +* Hardware Availability: [ErgoDox EZ](https://ergodox-ez.com/), [ErgoDox.io](https://ergodox.io) -To flash the firmware: +Make example for this keyboard (after setting up your build environment): - - Build the firmware with `make <keyboardname>:<keymapname>`, for example `make ergodox_ez:default` + make ergodox_ez:default:flash - - This will result in a hex file called `ergodox_ez_keymapname.hex`, e.g. - `ergodox_ez_default.hex` +See the [build environment setup](https://docs.qmk.fm/#/getting_started_build_tools) and the [make instructions](https://docs.qmk.fm/#/getting_started_make_guide) for more information. Brand new to QMK? Start with our [Complete Newbs Guide](https://docs.qmk.fm/#/newbs). - - Start the teensy loader. +## Oryx Configuation - - Load the .hex file into it. +If you have `ORYX_CONFIGURATOR` defined in your keymap's `config.h`, this enables a number of the built in options from the Oryx Configurator. - - Press the Reset button by inserting a paperclip gently into the reset hole - in the top right corner. +### Indicator LEDs - - Click the button in the Teensy app to download the firmware. +You can use the `LED_LEVEL` keycode to cycle through the brightness levels for the LEDs on the top right of the keyboard. These settings are saved in eeprom (persistant memory). -See also [video demonstration](https://www.youtube.com/watch?v=9PyiGUO9_KQ) using Teensy in auto mode. +Alternatively, you can set the brightness by calling the following functions: -To flash with ´teensy-loader-cli´: +```c +void ergodox_led_all_set(uint8_t level); +void ergodox_right_led_1_set(uint8_t level); +void ergodox_right_led_2_set(uint8_t level); +void ergodox_right_led_3_set(uint8_t level); +``` - - Build the firmware with `make keymapname`, for example `make default` +These settings are not persistent, so you'd need to reset it every time the board starts. - - Run ´<path/to/>teensy_loader_cli -mmcu=atmega32u4 -w ergodox_ez_<keymap>.hex´ +These are on a 0-255 scale - - Press the Reset button by inserting a paperclip gently into the reset hole - in the top right corder. +### RGB Matrix Features -## Settings +If you're using the Smart LED (layer indication) feature from the Oryx Configurator, you want to make sure that you enable these options by adding `#define ORYX_CONFIGURATOR` to your keymap's `config.h`. -You may want to enable QMK_KEYS_PER_SCAN because the Ergodox has a relatively -slow scan rate. +This changes the `RGB_TOG` keycode so that it will toggle the lights on and off, in a way that will allow the Smart LEDs to continue to work, even with the rest of the LEDs turned off. + +Additionally, a new keycode has been added to toggle the Smart LEDs. Use `TOGGLE_LAYER_COLOR`, if you aren't already. |
